OpenCV at the edge

Published Apr 1, 2024
TL;DR; In this post, we’re looking at how to connect opencv at the edge for moving advanced processing to the edge.
In my current role as Chief Innovation Officer at Herring Bank, amongst other project, I was tasked with bringing identity confirmation and detection as part of increasing the friendliness and advanced technologies into the bank.
One of my initial projects is to create a US driver’s license capture method without requiring customers to sign up for an account. Due to regulations, we also need to keep customer’s information private and secure. Rather than having multiple requests/responses sent to and from the customers, we’ve moved the processing of sensitive information to the edge, encrypt, and send the payload as a single bundle.
Enter OpenCV
OpenCV (Open Source Computer Vision Library) is an open-source computer vision and machine learning software library. It was built to provide a common infrastructure for computer vision applications and to accelerate the use of machine perception in commercial products. Being a BSD-licensed product, OpenCV makes it easy for businesses to utilize and modify the code.
It’s written in C++, but supports other programming languages, like Python and JavaScript.
The task
We’re going to capture a picture of a driver’s license. In the US, driver’s licenses have information coded in a PDF417 format. Now, we don’t need to decode the PDF on the edge, but we do need to ensure we’ve captured a usable barcode.
Project requirements
For this project, we need to capture the back of a barcode in a high-resolution image. We don’t need to encode or decode the image, just identify that we have one.
- Provide a view for users to capture a license
- Capture a high-resolution image
- Identify a PDF417 barcode in the image
As downloading an app presents a big reason not to continue (the barrier of entry), we’ll use a webview that we can just send a link to our users to scan their license.
Project tools
The final project is available on Github at auser/capture-app.
You can create this using any JavaScript project. For the focus of this post, we’ll use Sveltekit and Typescript. We’re also going to push the bulk of our work to a background worker thread so we don’t block the main UI thread.
Let’s create a sveltekit project.
npm create svelte@latest capture-appcd capture-appnpm installnpm run dev
Accepting all the defaults (while selecting TypeScript), the browser at http://localhost:5173 will be blank.
Now we need to add a video element to capture the actual input. I’m going to break this out into a component with 2 components underneath. While this separation is not necessary, it will greatly clean up our codebase.
Let’s follow this pattern. Let’s create a src/lib/components/ directory and create add placeholder component in src/lib/components/PDF417Scanner.svelte with just some text to make sure we get it on the page.
<h1>I'm a scanner component</h1>
To make sure our component shows up, open the initial +page.svelte app and add a reference to the <PDF417Scanner /> component.
<script lang="ts">import Pdf417Scanner from '$lib/components/PDF417Scanner.svelte';</script><Pdf417Scanner />
Now that’s not very exciting, so let’s add two distinct parts to the component:
- a
<video />element to capture the actual image - a
<canvas />element to draw a target - another
<canvas />element for debugging
We’ll create two components where 1 sits on top of the other so the video is covered up by the preview frame.
We’ll use some simple CSS magic to place both elements at the same spot and cover one with the other. Back in PDF417Scanner.svelte, let’s add these two components.
<div class="cam-wrapper"><canvas /><video /></div>
Nothing will be showing just yet. In order to get a video stream on the page into that <video /> element, we’ll need to use the navigator API. The API is pretty straightforward to get a video element.
Although in this demo app, we’ll place the request for media here, the demo source-code wraps it in it’s own component.
First, let’s create a tiny store just for this application to host the available devices.
<script context="module" lang="ts">import { writable } from 'svelte/store';const selectedCamera = writable<MediaDeviceInfo | null>(null);</script><script lang="ts">// We'll do all of our work in here</script><div class="cam-wrapper"><canvas /><video /></div>
To actually get the video streaming, we’ll need to request access to the camera so the user gives our app permission to use it.
Since we’re going to use video on the page in the browser, we’ll use the onMount() API to request access to it. Skipping over describing the MediaDevices API, selecting a stream in onMount() looks like this:
<script lang="ts">let stream: MediaStream | null;let devices: MediaDeviceInfo[] = [];$: cameras = devices.filter((d) => d.kind === 'videoinput');onMount(async () => {try {// Request the streamstream = await requestStream();devices = await navigator.mediaDevices.enumerateDevices();} catch (e: any) {console.error(e);}});function requestStream() {const constraints: MediaStreamConstraints = {audio: false,video: {deviceId: $selectedCamera ? $selectedCamera.deviceId : undefined,facingMode: 'environment'}};const stream = navigator.mediaDevices.getUserMedia(constraints);return stream;}</script>
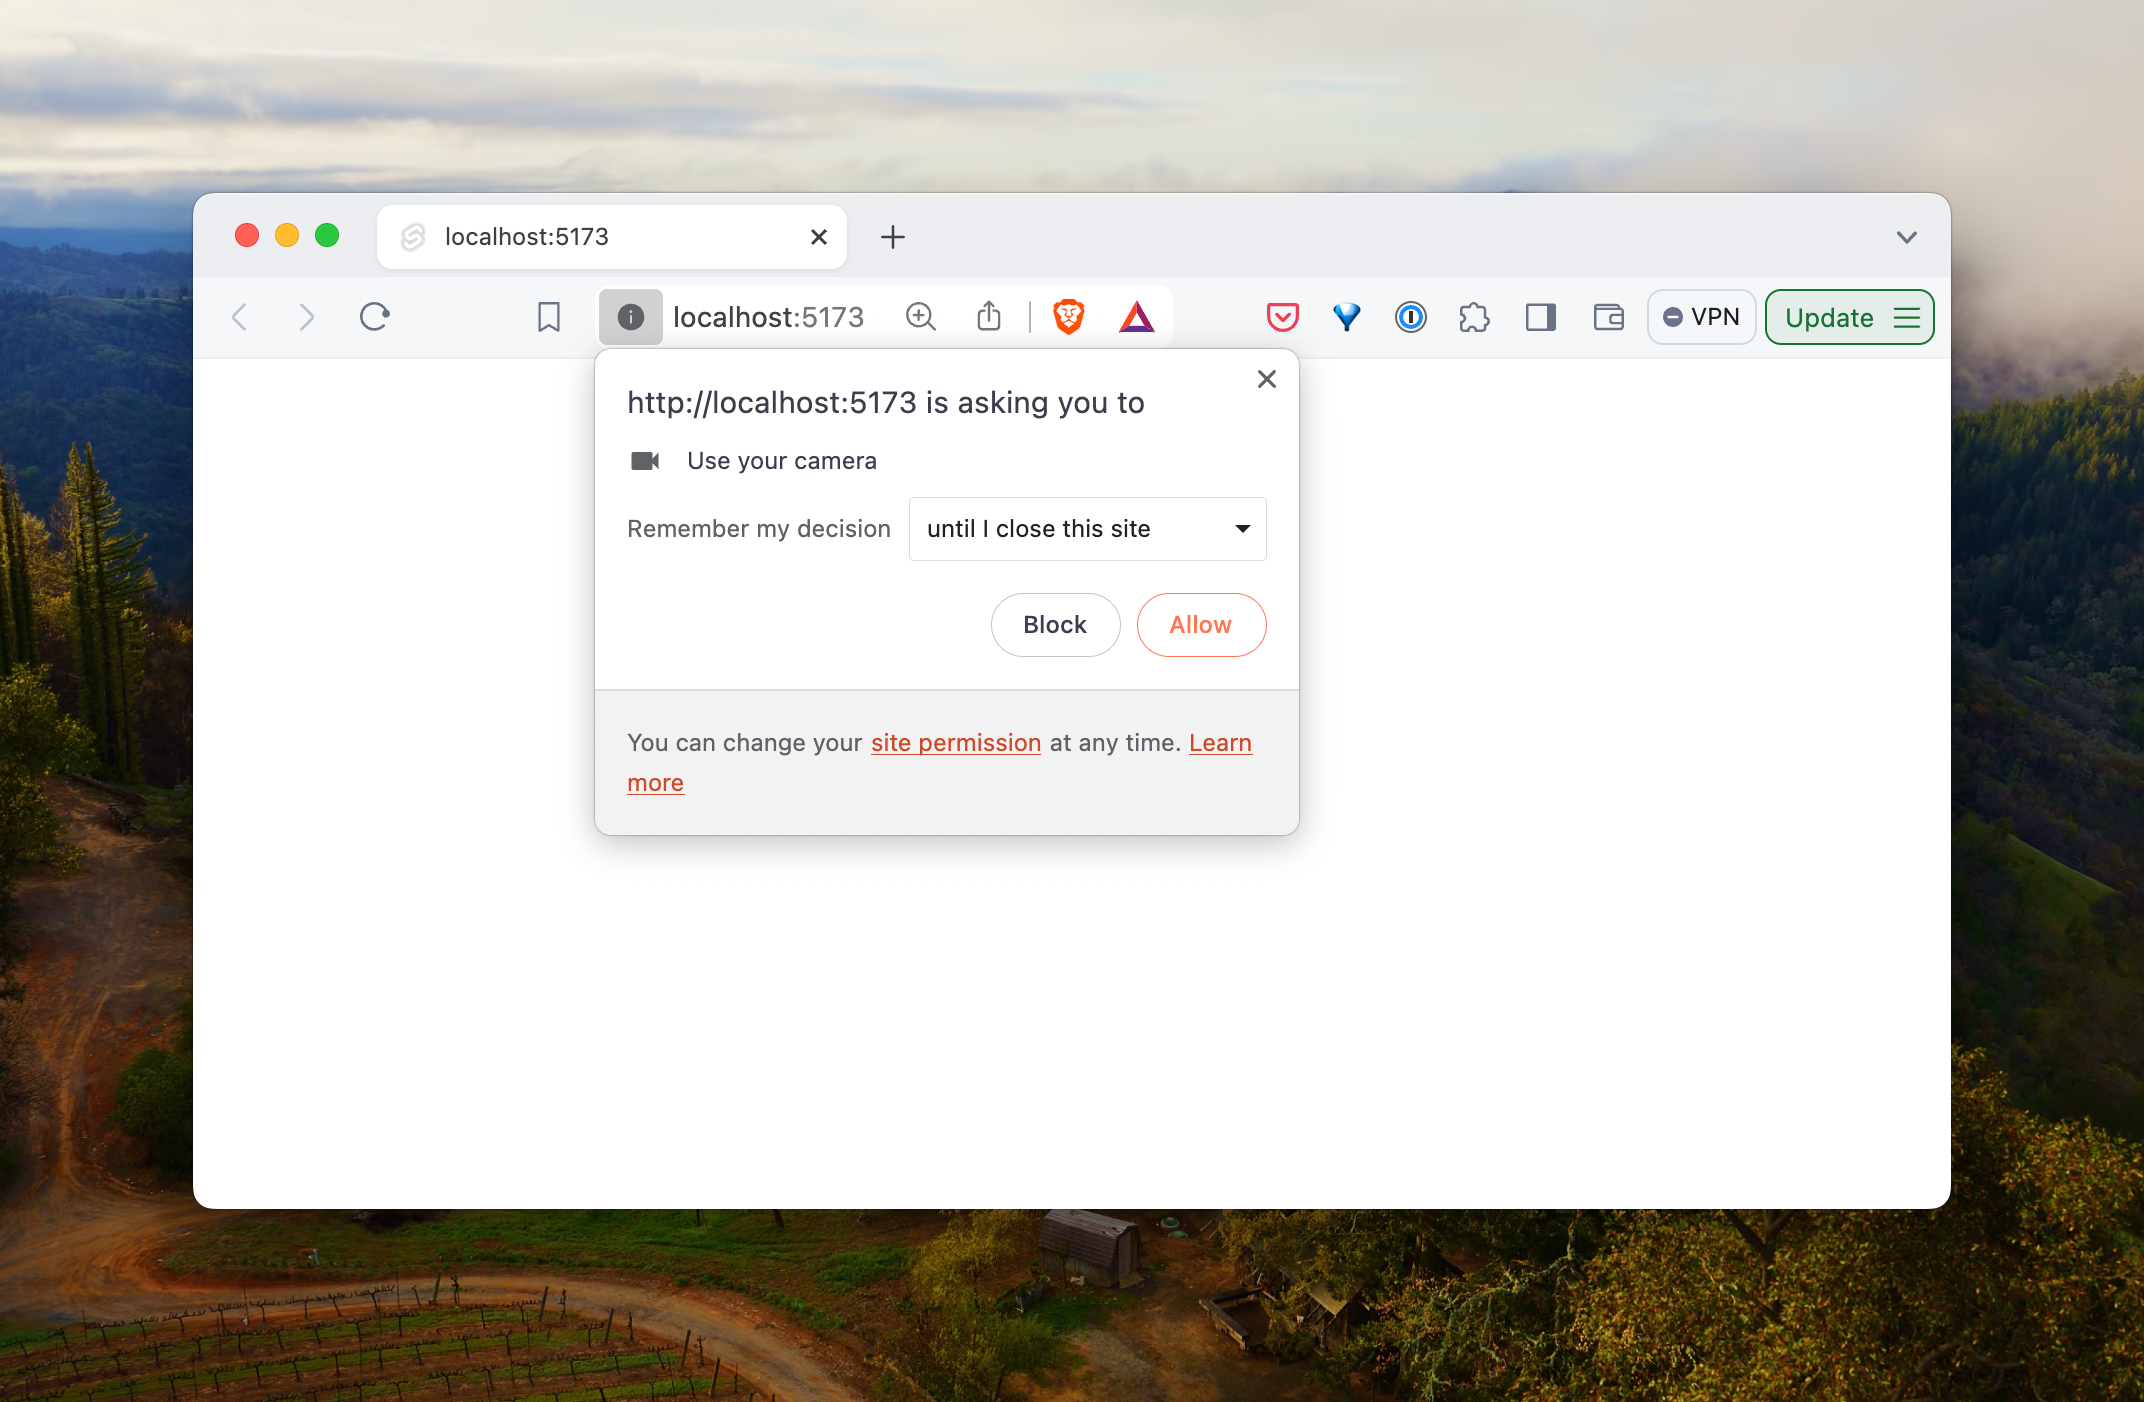
Despite the fact we’re not using it, your browser will show a request for permission to use your camera.
Finally, let’s get the browser to show this streaming video with our stream. Personally, I like to use a binding to a function that will append the MediaStream to the HTMLVideoElement. For this, let’s simultaneously add the function we’ll use for binding the srcObject to the video:
// ...<script lang="ts">// ...function srcObject(node: HTMLVideoElement, stream: MediaStream) {node.srcObject = stream;return {update(newStream: MediaStream) {if (node.srcObject != newStream) node.srcObject = newStream;}};}</script><div class="cam-wrapper"><canvas /><video use:srcObject={stream} playsinline autoplay /></div>
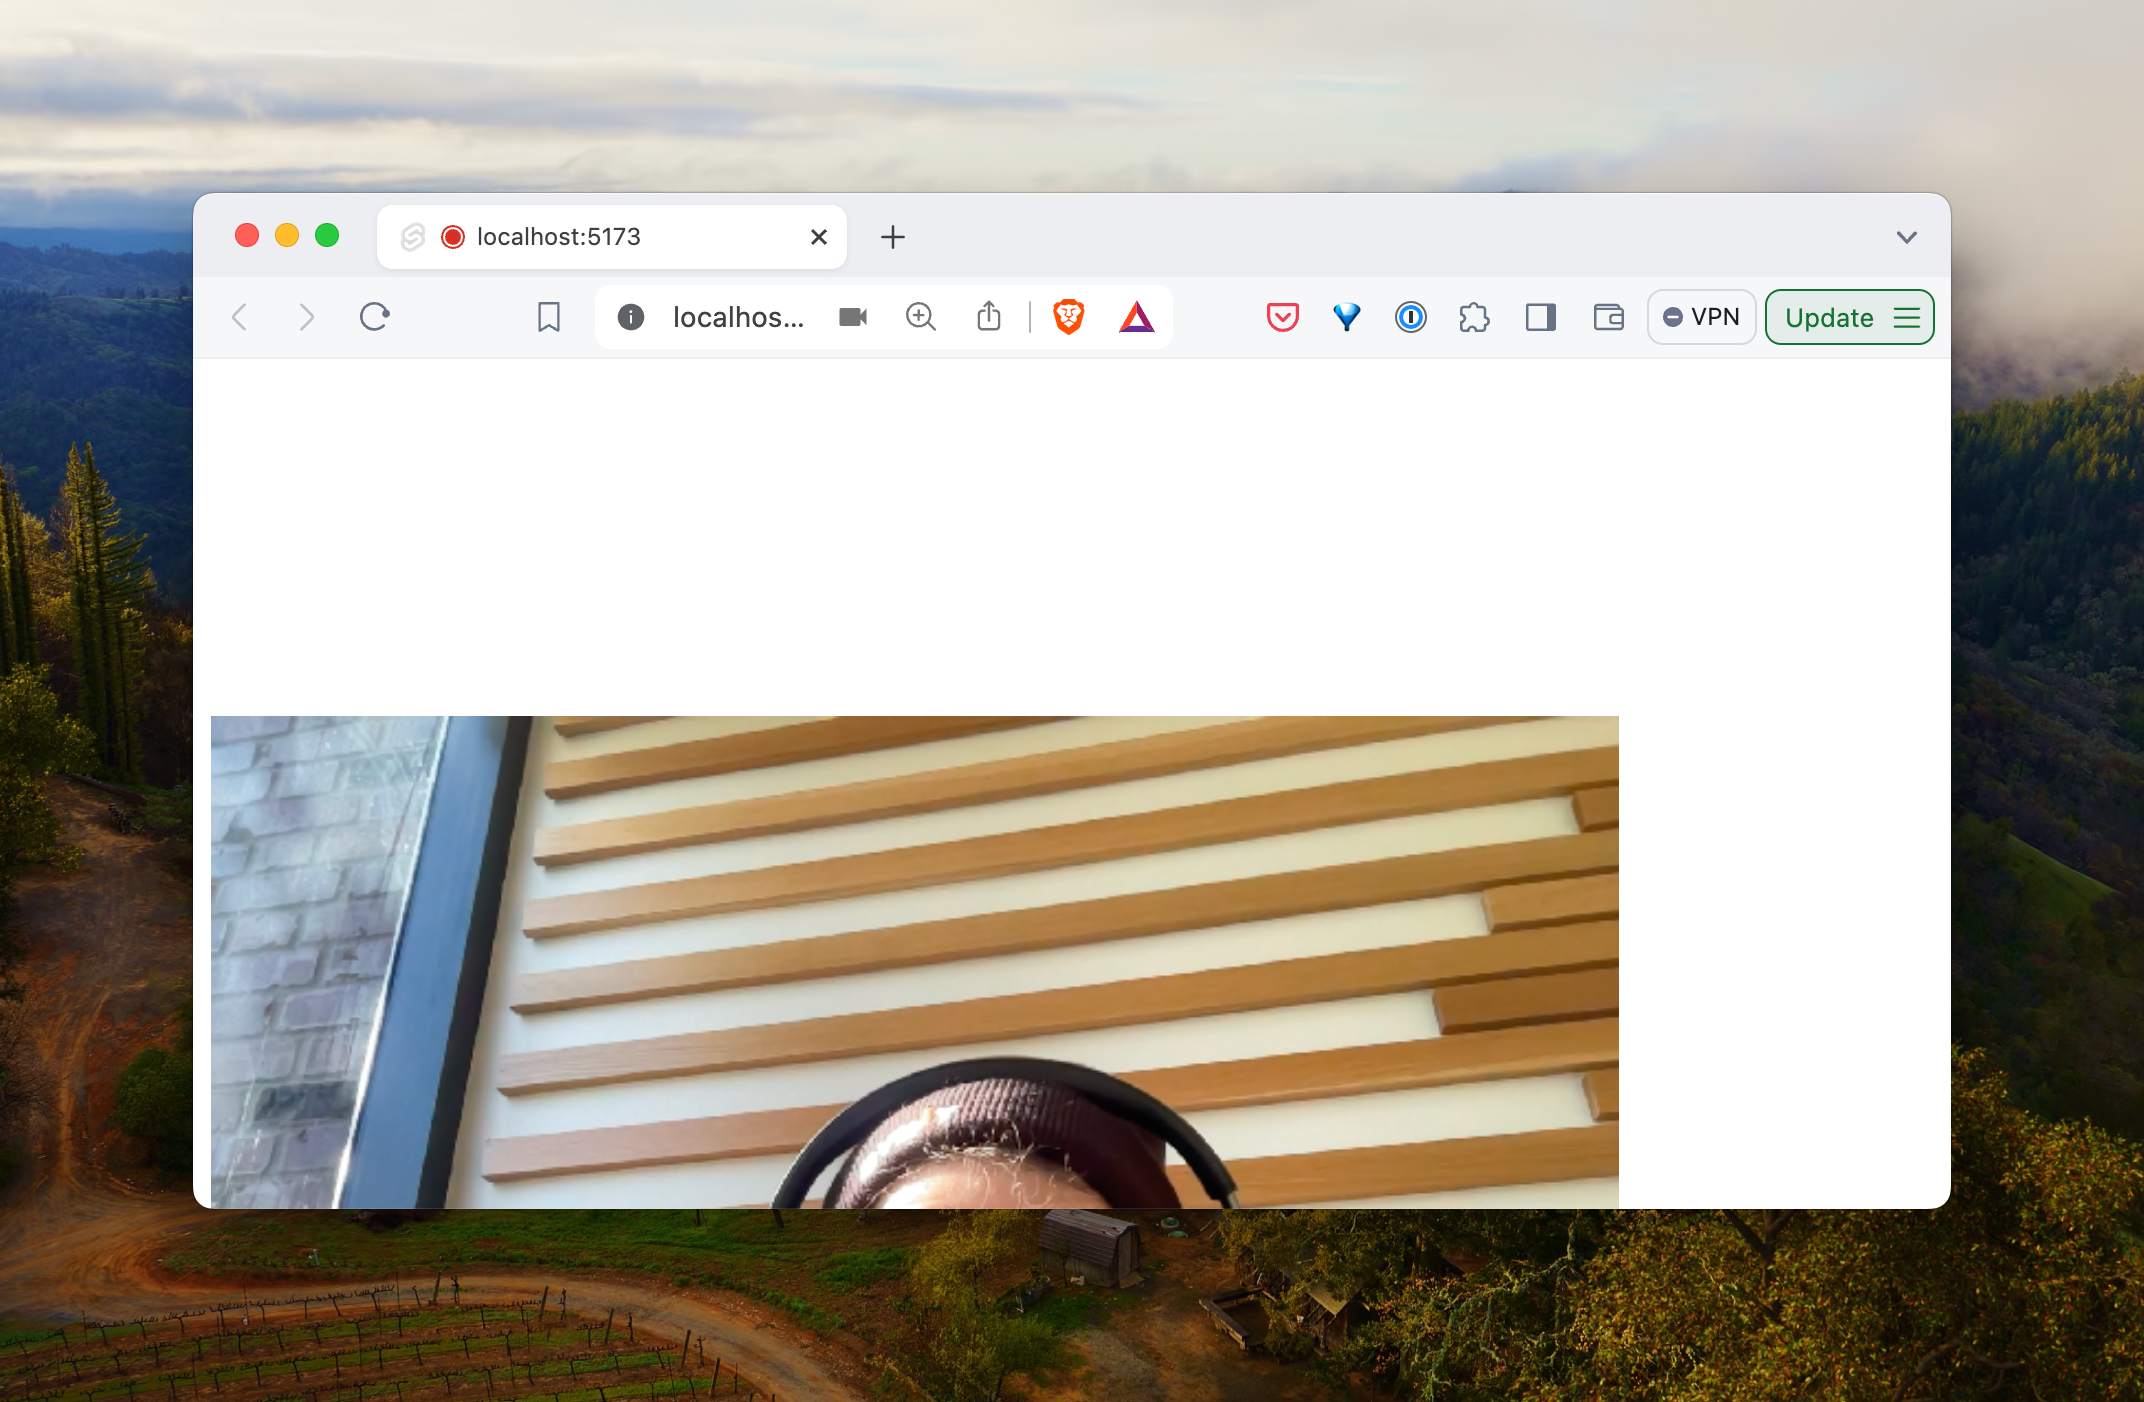
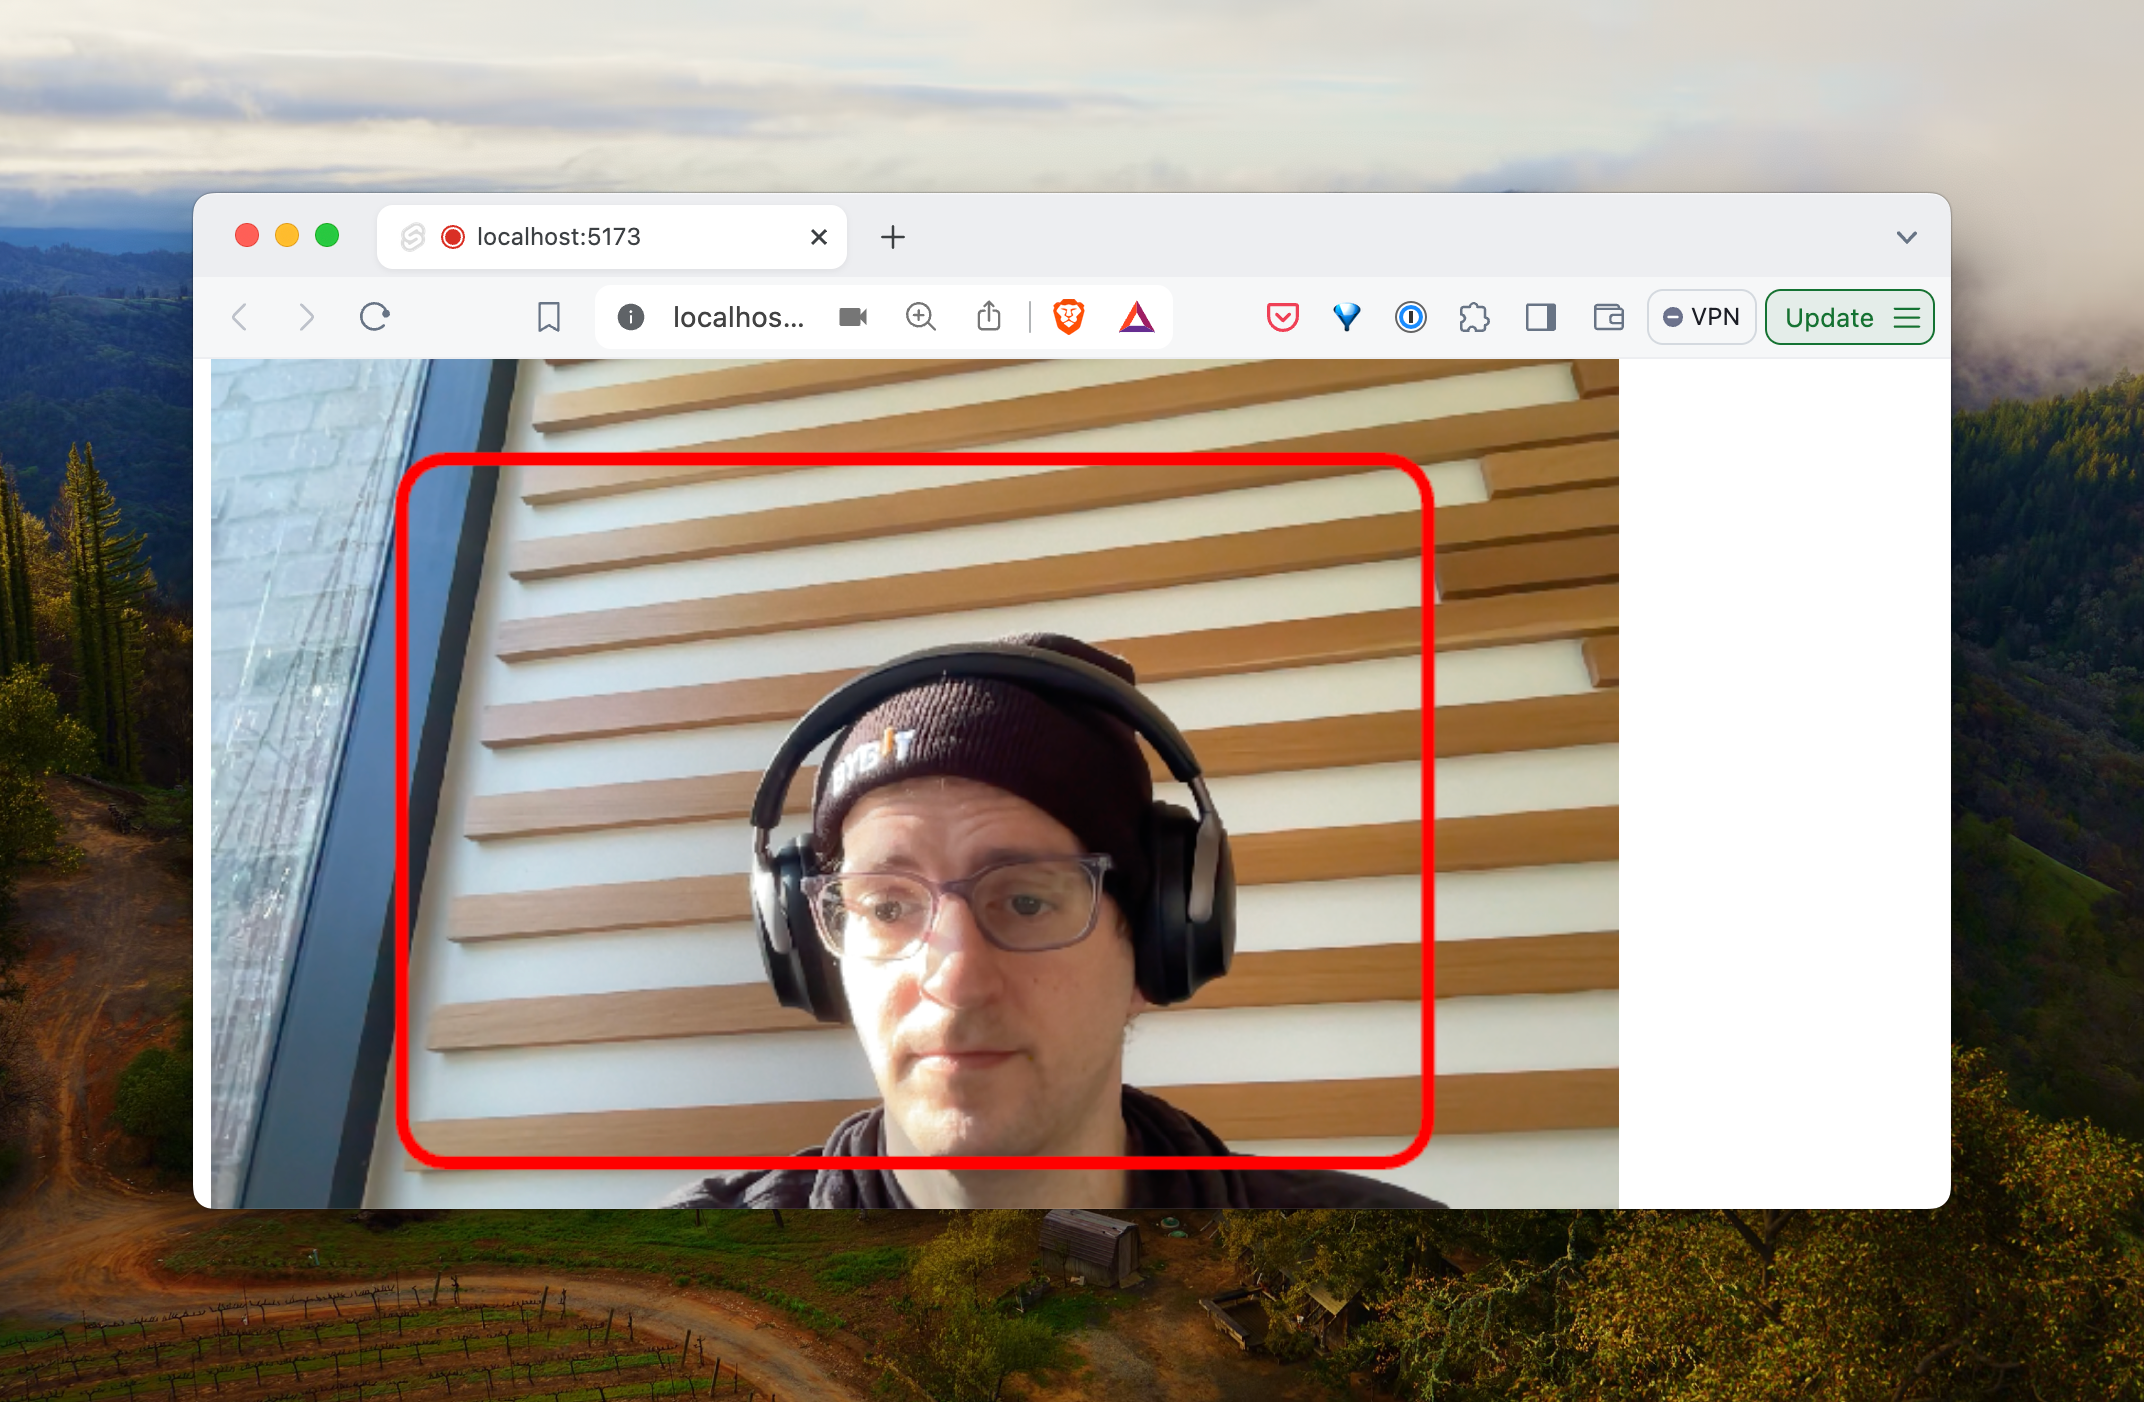
If there are no errors, you’ll see your pretty face in the browser
Let’s add a little bit of CSS so our canvas is above the video element (as well as a little restructuring of the video element):
// ...<div class="cam-wrapper"><div class="preview"><canvas /></div><div class="video"><video use:srcObject={stream} playsinline autoplay muted /></div></div><style>.cam-wrapper {display: flex;flex-direction: column;align-items: center;position: relative;}.cam-wrapper .preview {width: 100%;height: auto;z-index: 10;position: absolute;top: 0;left: 0;}.cam-wrapper .video {width: 100%;height: auto;z-index: 0;position: absolute;top: 0;left: 0;bottom: 0;}</style>
Now it should look like you just have one stream where the <canvas /> element is positioned right above the <video /> element.
Before we get into opencv (the bulk of the rest of the post is focused entirely on opencv), let’s draw a target for our users to hold their license up on the canvas.
We’ll update this as we go, but let’s draw a simple rectangle on the <canvas />. To position this target rectangle, we’ll need to capture the height and the width of the current canvas.
Since we’ll need to update the width and the height later, let’s add these props to our component. I’m also going to add a padding around our actual target. We’ll also need a reference to our <canvas /> element
// ...<script lang="ts">// Add these for referencing heightexport let previewWidth = 640;export let previewHeight = 480;// Bind the canvas to our JS objectlet previewCanvas: HTMLCanvasElement;$: width = previewWidth;$: height = previewHeight;</script><div class="cam-wrapper"><div class="preview"><canvas bind:this={previewCanvas} {width} {height} /></div><div class="video"><video use:srcObject={stream} {width}{height} playsinline autoplay muted /></div></div>
Since we’re using a standard US license size, which is 3.625 inches wide and 2.375 inchese tall, we’ll use this as an aspect ratio.
Adding the drawing capabilities just becomes clear. To simplify the matter, let’s create a function drawTarget() that we will just call in onMount():
// ...<script lang="ts">// Add these for referencing heightexport let previewWidth = 640;export let previewHeight = 480;// Bind the canvas to our JS objectlet previewCanvas: HTMLCanvasElement;onMount(async () => {try {// ...// Draw targetdrawTarget();} catch (e: any) {console.error(e);}});// drawTarget on the canvas in front of the `<video />` element// while keeping room for paddingfunction drawTarget() {const ctx = previewCanvas.getContext('2d');if (ctx) {const padding = 100;const effectiveCanvasWidth = width - padding * 4;const effectiveCanvasHeight = height - padding * 4;let aspect_ratio = 3.625 / 2.375;let box_height, box_width: number;if (effectiveCanvasWidth / effectiveCanvasHeight > aspect_ratio) {box_height = effectiveCanvasHeight - padding * 4;box_width = effectiveCanvasWidth * aspect_ratio + padding;} else {box_width = effectiveCanvasWidth;box_height = effectiveCanvasHeight * aspect_ratio + padding * 4;}let x = (width - box_width) / 2;let y = (height - box_height) / 2;ctx.beginPath();ctx.lineWidth = 6;// We'll change this laterctx.strokeStyle = 'red';ctx.roundRect(x, y, box_width, box_height, 20);ctx.stroke();}}$: width = previewWidth;$: height = previewHeight;</script><div class="cam-wrapper"><div class="preview"><canvas bind:this={previewCanvas} {width} {height} /></div><div class="video"><video use:srcObject={stream} playsinline autoplay muted /></div></div>
OpenCV
The remainder of this section, for the most part is focused on opencv. We need to get access to OpenCV in our frontend. There are a few different ways to handle this. For simplicity, I’ll add the package @techstark/opencv-js.
There are a few different ways to handle this. For simplicity, I’ve used the package route as it’s the simplest, imho.
For other ways, check out the opencv documentation
npm install --save @techstark/opencv-js
Since we want our app to be performat, we’re going to move the logical calculations of opencv into a worker. Workers in JavaScript allow us to push the heavy lifting to a background thread and leave the main thread to not block.
Creating a worker in Sveltekit is easy. Let’s create a directory src/lib/workers/barcode.worker and add a worker inside an index.ts file:
// Indicates we're using a workeronmessage = async function (e: MessageEvent<any>) {console.log('Event: ', e);};export {};
Now we can load this on the page loadup, but every page will then have to load opencv. Instead, let’s create an interface to load up the worker. We’ll use this interface inside Sveltekit to call and handle communication between the image worker and page.
Create a directory and a file we’ll call imageWorker.ts and add the CV class declaration:
We’ll use the same pattern as Aral Roca wrote about where we’ll use his great dispatch() method. Let’s add that skeleton to our imageWorker.ts function.
export class CV {_status: any = {};worker: Worker | null = null;constructor() {this._status = {};this.worker = null;}async load() {// Add loading function in here}// Dispatch function to communicate with the background worker// Checkout https://aralroca.com/blog/opencv-in-the-web for a deeper// discussion of this function_dispatch(event: any) {const msg = event.msg;this._status[msg] = ['loading'];if (!this.worker) {throw new Error('Worker not loaded');}this.worker.postMessage({ ...event });return new Promise((res, rej) => {const interval = setInterval(() => {const status = this._status[msg];if (status && status[0] === 'done') {clearInterval(interval);return res(status[1]);}if (status && status[0] === 'error') {clearInterval(interval);return rej(status[1]);}if (status && status[0] !== 'loading') {delete this._status[msg];clearInterval(interval);}}, 50);});}}export default new CV();
Let’s grab the worker inside our main PDF417Scanner.svelte component:
<script lang="ts">import imageWorker from '$lib/services/imageWorker';// ...</script>
In order to actually load openCV, we’ll need to require it on the page. Since we’ll want to run this in a worker, let’s add a load() function to our imageWorker to handle the requiring of opencv.js.
export class CV {_status: any = {};worker: Worker | null = null;// ...async load() {const BarcodeWorker = await import('$lib/workers/barcode.worker?worker');this.worker = new BarcodeWorker.default();this.worker.onmessage = (e) => {return (this._status[e.data.msg] = ['done', e]);};this.worker.onerror = (e) => {return (this._status.load = ['error', e]);};// Dispatch this methodreturn this._dispatch({ msg: 'load' }).catch((e) => {console.error('Error loading worker', e);});}// ...}
A quick recap of what this is doing is telling vite (powering sveltekit – and other frameworks like Vue and React) we don’t want to import the code, but a reference to the file our browser can get access to. We’re then storing it inside the instance of our CV class so we can refer to it later.
Back in our PDF417Scanner.svelte, let’s import the helper and call load() in the onMount() function.
// ...<script lang="ts">import imageWorker from '$lib/services/imageWorker';// Store a reference to the workerlet cv: typeof imageWorker;// ...onMount(async () => {// ...cv = await imageWorker;await cv.load();})</script><!-- ... -->
Once that’s loaded, we’re bootstrapped for working with opencv. Since we’re going to use the <canvas /> element for the previewing instead of the video, let’s break out our target drawing as well as a function to update the canvas with the latest frame from the video element.
// ...<script lang="ts">import imageWorker from '$lib/services/imageWorker';export let previewIntervalTime: number = 500;// Store a reference to the timeoutlet videoFeedInterval: NodeJS.Timeout | null = null;// ...async function updatePreviewFrame() {const image = getVideoImage();if (!image) return;}async function startWatching() {if (videoFeedInterval) clearInterval(videoFeedInterval);videoFeedInterval = setInterval(updatePreviewFrame, previewIntervalTime);}onMount(async () => {// ...startWatching();})</script><!-- ... -->
I added a startWatching() and updatePreviewFrame() function to update the canvas every previewIntervalTime milliseconds. For the sake of the post, I’ve also extracted getVideoImage() into it’s own function to grab a frame from the video and draw it on the canvas element:
function getVideoImage() {const res = _drawImageAndReturnContext();if (res) {const { context, canvas } = res;const image = context.getImageData(0, 0, canvas.width, canvas.height);return image;}}function _drawImageAndReturnContext() {if (videoRef) {const devicePixelRatio = window.devicePixelRatio || 1;const canvas = document.createElement('canvas');// Adjusting for device pixel ratio for high-resolution displayscanvas.width = previewWidth * devicePixelRatio;canvas.height = previewHeight * devicePixelRatio;const ctx = canvas.getContext('2d');if (!ctx) return;// Scale canvas context to match device pixel ratioctx.scale(devicePixelRatio, devicePixelRatio);// Draw the video frame to canvas considering the device pixel ratioctx.drawImage(videoRef, 0, 0, previewWidth, previewHeight);return { context: ctx, canvas };}}</script><div class="cam-wrapper"><div class="preview"><canvas bind:this={previewCanvas} {width} {height} /></div><div class="video"><video use:srcObject={stream} playsinline autoplay muted bind:this={videoRef} /></div></div>
This breaks up the getVideoImage() into two functions. Once is to create an in-memory canvas to draw the image so we can pull the ImageData into a variable. In addition, I’ve added drawing to take into account the aspect ratio as well as setting the canvas dimensions.
Let’s add a handler in the worker for the message posed with the message: load. In our barcode.worker our onmessage() function:
onmessage = async function (e: MessageEvent) {switch (e.data.msg) {case 'load':// post this back so the `ImageWorker` knows we're loadedthis.postMessage({ msg: e.data.msg });break;default:console.log('got an unhandled message: ', e.data.msg);break;}};
Onward to the image processing
In our ImageWorker, let’s add a function that dispatches a method to the worker of processImage:
export class CV {// ...async processImage(imageData: ImageData, options: any) {return this._dispatch({ msg: 'processImage', data: { data: imageData, options } });}}
Now let’s catch this message inside our worker and write our functionality to process the image:
onmessage = async function (e: MessageEvent) {console.log('Message received from main script', e.data);switch (e.data.msg) {case 'processImage':processImage(e.data).then(() => {postMessage({ msg: 'done' });}).catch((e) => {postMessage({ msg: 'error', error: e });});break;case 'load':this.postMessage({ msg: e.data.msg });break;default:console.log('got an unhandled message: ', e.data.msg);break;}};async function processImage({ msg, data }: any) {console.log('Processing image', data);}// Importantexport {};
In our interval on the PDF417Scanner.svelte, lets call this new processImage() function:
async function updatePreviewFrame() {const image = getVideoImage();if (!image) return;await cv.processImage(image, { width, height });}
In our browser we now should see a bunch of console.log() statements

Finally, let’s add an onmessage handler in our PDF417Scanner.svelte component that accepts messages coming back from our worker. We’ll also tell our worker that we want the onmessage to redirect to our new handler:
// Our `onMount` functiononMount(async () => {try {// ...overrideWorker();} catch (e) {// ...}});// Handler for the worker internallylet imgProcessMessageHandler = async (e: MessageEvent<any>) => {if (!e.data) return;switch (e.data.msg) {case 'debug': {writePreviewFrame(e.data.imageData);break;}case 'error': {if (e.data.reason === 'noLargestBarcode') {// TODO} else {startWatching();}}}};// Writer for debuggingasync function writePreviewFrame(image: ImageData) {// if (!previewCanvas || !showOverlay) return;const ctx = previewCanvas.getContext('2d', { willReadFrequently: true });if (ctx) {ctx.putImageData(image, 0, 0);}}// Handlers for the workerfunction overrideWorker() {if (cv.worker) cv.worker.onmessage = imgProcessMessageHandler;}
Image Processing
When we post a processImage method, we’ll include the width of the image. We’ll need to keep a capture of the width so we can rescale it without losing any data. Since our processing can be very costly in terms of cycles and memory, we’ll rescale our image as we’re processing to minimize this as much as possible.
We’ll be sending along the imageData that we captured in the video frame as well as the height and width of the original object.
async function processImage({ msg, data }: any) {// The original widthconst { width } = data.options;// The imageData we sent alongconst img = cv.matFromImageData(data.data);}
When we’re using opencv, we are going to be working primarily with the Mat datastructure. It’s a fundamental datastructure in opencv and you can think about it like a matrix (remember those from math class?).
They have some really unique characteristics around dealing with data, including a the datatype (something in JavaScript land we don’t often need to think about), the number of channels, header and data information, memory management, etc. The important detail for us is that we’ll create and delete these matricies as we’re processing our image.
Finally, I’m going to add some debugging information as we’re working through so we can see exactly what we’re doing with the image.
To make sure we can receive the image back after processing, we’ll need a way to convert our image back to ImageData for our frontend app to use. For that here’s a function we’ll use:
export function imageDataFromMat(mat: Mat) {// converts the mat type to cv.CV_8Uconst img = new cv.Mat();const depth = mat.type() % 8;const scale = depth <= cv.CV_8S ? 1.0 : depth <= cv.CV_32S ? 1.0 / 256.0 : 255.0;const shift = depth === cv.CV_8S || depth === cv.CV_16S ? 128.0 : 0.0;mat.convertTo(img, cv.CV_8U, scale, shift);// converts the img type to cv.CV_8UC4switch (img.type()) {case cv.CV_8UC1:cv.cvtColor(img, img, cv.COLOR_GRAY2RGBA);break;case cv.CV_8UC3:cv.cvtColor(img, img, cv.COLOR_RGB2RGBA);break;case cv.CV_8UC4:break;default:console.log('Bad number of channels (Source image must have 1, 3 or 4 channels)');throw new Error('Bad number of channels (Source image must have 1, 3 or 4 channels)');}const clampedArray = new ImageData(new Uint8ClampedArray(img.data), img.cols, img.rows);return clampedArray;}
With that out of the way, let’s rescale the image to something much smaller. I’ll create a rescale() function that takes the image as well as a width to rescale. We’ll need to keep a hold of the same aspect ratio so we don’t just flatten one size:
// resizes the given image, maintaining the aspect rationexport const rescale = (src: Mat, targetWidth: number) => {// The destination of our transformationconst dst = new cv.Mat();// The original size of the matrix/imageconst srcSize = src.size();// The scaled sizeconst dstSize = new cv.Size(targetWidth, (srcSize.height * targetWidth) / srcSize.width);// Running the actual functioncv.resize(src, dst, dstSize);return dst;};
We’ll call the function to get a resized image:
function resizeImage(src: Mat, width = 500) {// Assuming 'src' is an already loaded cv.Mat imagelet dst = new cv.Mat();let size = new cv.Size(width, Math.round(src.rows * width / src.cols));// Resize the imagecv.resize(src, dst, size, 0, 0, cv.INTER_LINEAR);return { image: dst, size: size };}

Since our application only really requires us to identify an area, we can throw away extra information from our working image to be grayscale. This way we can process only “areas” we’re interested in.
async function processImage({ msg, data }: any) {// ...const img = cv.matFromImageData(data.data);let { image: workingImage, size } = resizeImage(img, 200);postMessage({ msg: 'debug', imageData: imageDataFromMat(workingImage) });// ...}
Now we have a resized image, let’s move on and preprocess our image. The image itself has a bunch of possible contours that represent edges. However, if we look just for all the edges, we’ll include blemishes, irrelevant edges, etc. We’ll need to smudge those out so we can only focus on the edges we’re interested in.
Step by step, we’ll:
- Enhance any details to the best of our abilities (so we can capture edges that might matter, we don’t know them yet)
- Convert the image to grayscale, so we don’t have to detail with any extra channels
- Blur the edges of all details
- Find the edges
- Ease the edges to smooth their importance
- Apply a morphological closing
The first couple of steps up until we find the edges look like this:
function preprocessImage(src: Mat) {let detail = new cv.Mat();let gray = new cv.Mat();let blur = new cv.Mat();let edges = new cv.Mat();let dilate = new cv.Mat();let closing = new cv.Mat();let kernel = cv.Mat.ones(5, 5, cv.CV_8U);// Enhance detailslet enhanced = enhanceDetails(src);// Convert to grayscalecv.cvtColor(enhanced, gray, cv.COLOR_BGR2GRAY);// Apply Gaussian Blurcv.GaussianBlur(gray, blur, new cv.Size(5, 5), 0, 0, cv.BORDER_DEFAULT);// Detect edgescv.Canny(blur, edges, 75, 200);return closing;}
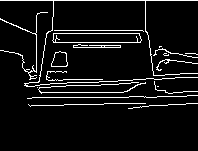
Notice we have a lot of edges we don’t really care about. We’ll want to get ride of those. We’ll use a function called dilate() to grow those edges. After we’ve preprocessed the image, we’ll be looking for edges that might be a square, which will identify our card.
function preprocessImage(src: Mat) {// ...// Dilatecv.dilate(edges, dilate, kernel, new cv.Point(-1, -1), 1, cv.BORDER_CONSTANT, cv.morphologyDefaultBorderValue());return dilate}

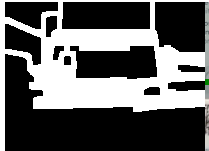
Notice how we still have edges that don’t close? Since our card and our pdf417 has a defined edge, we’ll want to rule those out too.
function preprocessImage(src: Mat) {// ...// Dilate// Dilatecv.dilate(edges, dilate, kernel, new cv.Point(-1, -1), 1, cv.BORDER_CONSTANT, cv.morphologyDefaultBorderValue());// Apply Morphological Closingcv.morphologyEx(dilate, closing, cv.MORPH_CLOSE, kernel);return closing}
That gives us our preprocessed image. One really important detail: we need to release the memory for Mat images we’re not using.
function preprocessImage(src: Mat) {let gray = new cv.Mat();let blur = new cv.Mat();let edges = new cv.Mat();let dilate = new cv.Mat();let closing = new cv.Mat();let kernel = cv.Mat.ones(5, 5, cv.CV_8U);// Enhance detailslet enhanced = enhanceDetails(src);// Convert to grayscalecv.cvtColor(enhanced, gray, cv.COLOR_BGR2GRAY);// Apply Gaussian Blurcv.GaussianBlur(gray, blur, new cv.Size(5, 5), 0, 0, cv.BORDER_DEFAULT);// Detect edgescv.Canny(blur, edges, 75, 200);// Dilatecv.dilate(edges, dilate, kernel, new cv.Point(-1, -1), 1, cv.BORDER_CONSTANT, cv.morphologyDefaultBorderValue());// Apply Morphological Closingcv.morphologyEx(dilate, closing, cv.MORPH_CLOSE, kernel);// Clean up intermediate Mats to free memoryenhanced.delete(); // Clean upgray.delete(); // Clean upblur.delete(); // Clean upedges.delete(); // Clean updilate.delete(); // Clean upkernel.delete(); // Clean upreturn closing;}
Finding the card
Now that we have an image we can work with, we’ll try to find the contours that might be a card.
The way we’ll handle this is by finding all the possible contours. Then we’ll look for the likley contours that have 4 edges and ard a likely size. We don’t want to find squares in the image that are meaningless, right?
Let’s update the processImage() function to call a new function we’ll write called findCard():
async function processImage({ msg, data }: any) {const img = cv.matFromImageData(data.data);let { image: workingImage, size } = resizeImage(img, 200);workingImage = preprocessImage(workingImage);// postMessage({ msg: 'debug', imageData: imageDataFromMat(workingImage) });let result = findCard(workingImage, size, CARD_MIN_AREA, CARD_MAX_AREA);workingImage.delete();img.delete();}
We’ll also want to look for a few details that are interesting to us. That is we’ll keep a debugging image and the four points around our card so we can isolate it down the road:
interface FindCardResult {fourPoints: cv.Mat | null;threshImgColor: cv.Mat | null;}
Before diving too deep into the findContours() details, we’ll start it out by looking for contours in a list (there are a few differnet methods of finding contours). If we don’t find any contours, we’ll abort immediately.
function findCard(threshImg: cv.Mat, size: cv.Size, CARD_MIN_AREA: number, CARD_MAX_AREA: number): FindCardResult {let contours = new cv.MatVector();let hierarchy = new cv.Mat();// Find contourscv.findContours(threshImg, contours, hierarchy, cv.RETR_LIST, cv.CHAIN_APPROX_SIMPLE);if (contours.size() === 0) {return { fourPoints: null, cntIsCard: [], threshImgColor: null };}// ...}
Great, if we do find contours in the image, we’ll want to look at the largest contours first. With each of the contours, we’ll select only the ones that meet the criteria of a card.
function findCard(threshImg: cv.Mat, size: cv.Size, CARD_MIN_AREA: number, CARD_MAX_AREA: number): FindCardResult {// ...// Sort contours by area in descending orderlet indexSort = Array.from(Array(contours.size()).keys()).sort((a, b) => cv.contourArea(contours.get(b)) - cv.contourArea(contours.get(a)));}
Before we go too much further, I’ll set up a debugging image so we can visualize our results on the front-end.
function findCard(threshImg: cv.Mat, size: cv.Size, CARD_MIN_AREA: number, CARD_MAX_AREA: number): FindCardResult {// ...// Sort contours by area in descending orderlet indexSort = Array.from(Array(contours.size()).keys()).sort((a, b) => cv.contourArea(contours.get(b)) - cv.contourArea(contours.get(a)));let fourPoints: cv.Mat | null = null;let threshImgColor = new cv.Mat();cv.cvtColor(threshImg, threshImgColor, cv.COLOR_GRAY2BGR);}
Now we don’t want to include contours that could be the card if they don’t have 4 edges. We’ll also only want to select rectangles that are big enough to be the actual license.
That all looks like this:
for (let i = 0; i < indexSort.length; i++) {let cnt = contours.get(indexSort[i]);let contourArea = cv.contourArea(cnt);let peri = cv.arcLength(cnt, true);let approx = new cv.Mat();cv.approxPolyDP(cnt, approx, 0.02 * peri, true); // Adjusted approximation factor for better accuracyif (contourArea > CARD_MIN_AREA && contourArea < CARD_MAX_AREA &&approx.rows === 4 && hierarchy.data32S[indexSort[i] * 4 + 3] === -1) {fourPoints = approx;cv.drawContours(threshImgColor, contours, indexSort[i], new cv.Scalar(255, 0, 0), 8);break; // Assuming you're looking for the first matching contour that fits the card criteria}approx.delete(); // Clean up}
That last piece of the code hierarchy.data32S[indexSort[i] * 4 + 3] === -1 make sure that the contour we’re interested in doesn’t have any inner contours. Since we’re looking for a block, we don’t want to include contours that surround bigger ones.
This entire code looks like this (with clean-up methods):
function findCard(threshImg: cv.Mat, size: cv.Size, CARD_MIN_AREA: number, CARD_MAX_AREA: number): FindCardResult {let contours = new cv.MatVector();let hierarchy = new cv.Mat();// Find contourscv.findContours(threshImg, contours, hierarchy, cv.RETR_LIST, cv.CHAIN_APPROX_SIMPLE);if (contours.size() === 0) {return { fourPoints: null, cntIsCard: [], threshImgColor: null };}// Sort contours by area in descending orderlet indexSort = Array.from(Array(contours.size()).keys()).sort((a, b) => cv.contourArea(contours.get(b)) - cv.contourArea(contours.get(a)));let cntIsCard = new Array(contours.size()).fill(0);let fourPoints: cv.Mat | null = null;let threshImgColor = new cv.Mat();cv.cvtColor(threshImg, threshImgColor, cv.COLOR_GRAY2BGR);for (let i = 0; i < indexSort.length; i++) {let cnt = contours.get(indexSort[i]);let contourArea = cv.contourArea(cnt);let peri = cv.arcLength(cnt, true);let approx = new cv.Mat();cv.approxPolyDP(cnt, approx, 0.02 * peri, true); // Adjusted approximation factor for better accuracyif (contourArea > CARD_MIN_AREA && contourArea < CARD_MAX_AREA && approx.rows === 4 && hierarchy.data32S[indexSort[i] * 4 + 3] === -1) {cntIsCard[indexSort[i]] = 1;fourPoints = approx;cv.drawContours(threshImgColor, contours, indexSort[i], new cv.Scalar(255, 0, 0), 8);break; // Assuming you're looking for the first matching contour that fits the card criteria}approx.delete(); // Clean up}contours.delete(); // Clean uphierarchy.delete(); // Clean upreturn { fourPoints, cntIsCard, threshImgColor };}

Finally we have a card, possibly. We just need to report it back to the front-end.
async function processImage({ msg, data }: any) {const img = cv.matFromImageData(data.data);let { image: workingImage, size } = resizeImage(img, 200);workingImage = preprocessImage(workingImage);// postMessage({ msg: 'debug', imageData: imageDataFromMat(workingImage) });let result = findCard(workingImage, size, CARD_MIN_AREA, CARD_MAX_AREA);// postMessage({ msg: 'debug', imageData: imageDataFromMat(workingImage) });if (result.fourPoints !== null) {postMessage({ msg, found: true });result.threshImgColor?.delete();result.fourPoints.delete();} else {postMessage({ msg, found: false });}workingImage.delete();img.delete();}
Updating the frontend
Back in sveltekit, we’ll want to update a variable that the worker tells us if a barcode is found or not. We can do that in the imgProcessMessageHandler function we set up before:
// Handler for the worker internallylet imgProcessMessageHandler = async (e: MessageEvent<any>) => {if (!e.data) return;switch (e.data.msg) {case 'debug': {writePreviewFrame(e.data.imageData);break;}case 'processImage': {foundPdf417 = e.data.found;break;}case 'error': {if (e.data.reason === 'noLargestBarcode') {// TODO} else {startWatching();}}}};
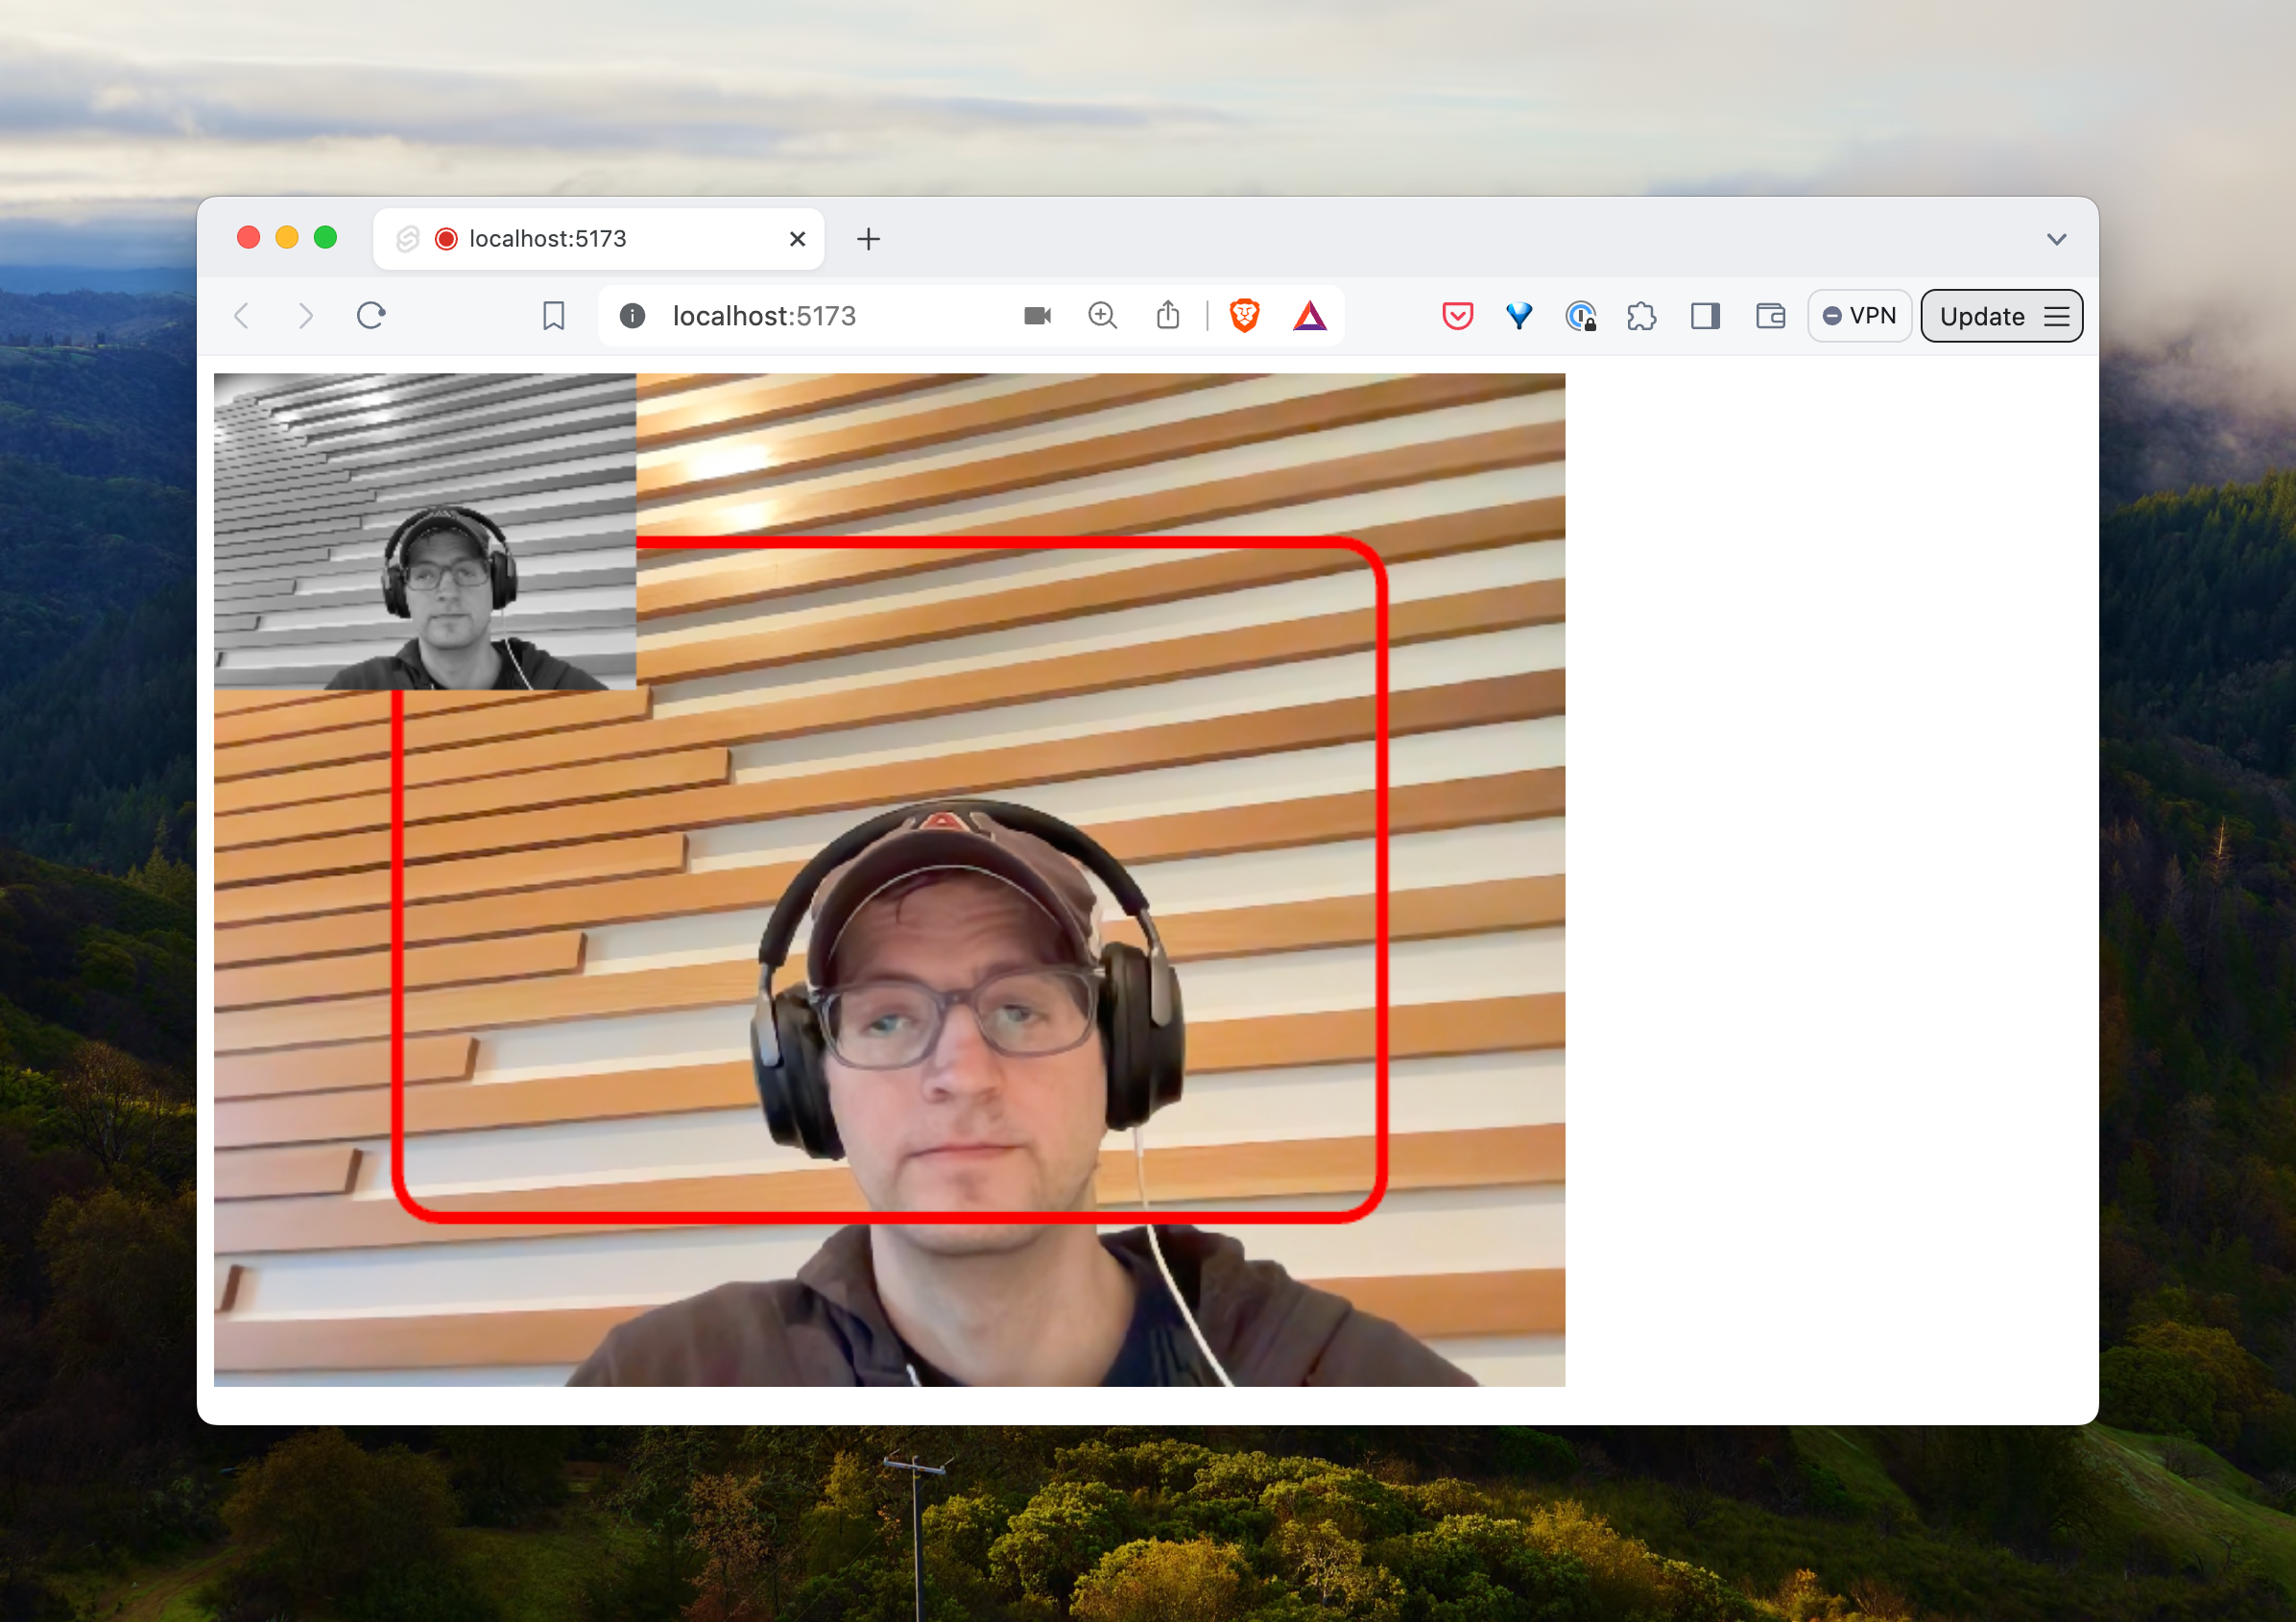
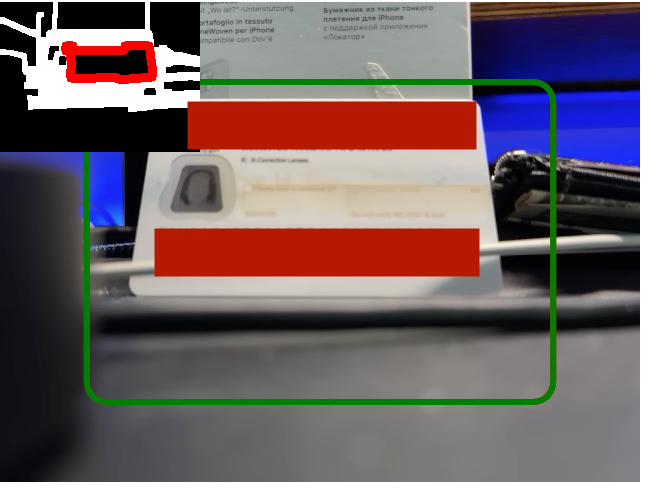
With that in place, we can update our drawTarget() function to draw a red box if there is no license found and a green one if there is to give the user some feedback that their image is good to go.
function drawTarget(found: boolean = false) {const ctx = previewCanvas && previewCanvas.getContext('2d');if (ctx) {// ...ctx.strokeStyle = found ? 'green' : 'red';// ...}}
Since we’re working in svelte, we need to set up a reactive variable to redraw the target when foundPdf417 changes its value
<scrpt lang="ts">// ...$: {drawTarget(foundPdf417);}</script>
Now our interface (with my personal details blurred out) shows our user when we’ve found a card and when we haven’t.

All the code here is available on github here: auser/capture-app